
Pantry Organization: Decanting, Zones & the Bins That Last
Pantry organization is the most photographed home project on the internet and the most quietly abandoned by month three. The systems that last aren't the prettiest — they're the ones where every household member can find what they want and put back what they're done with, in under ten seconds, without thinking. Below — the six zones every pantry needs, the decanting choices that pay back, and the bins worth the money.
Updated May 2026 · 9 min read
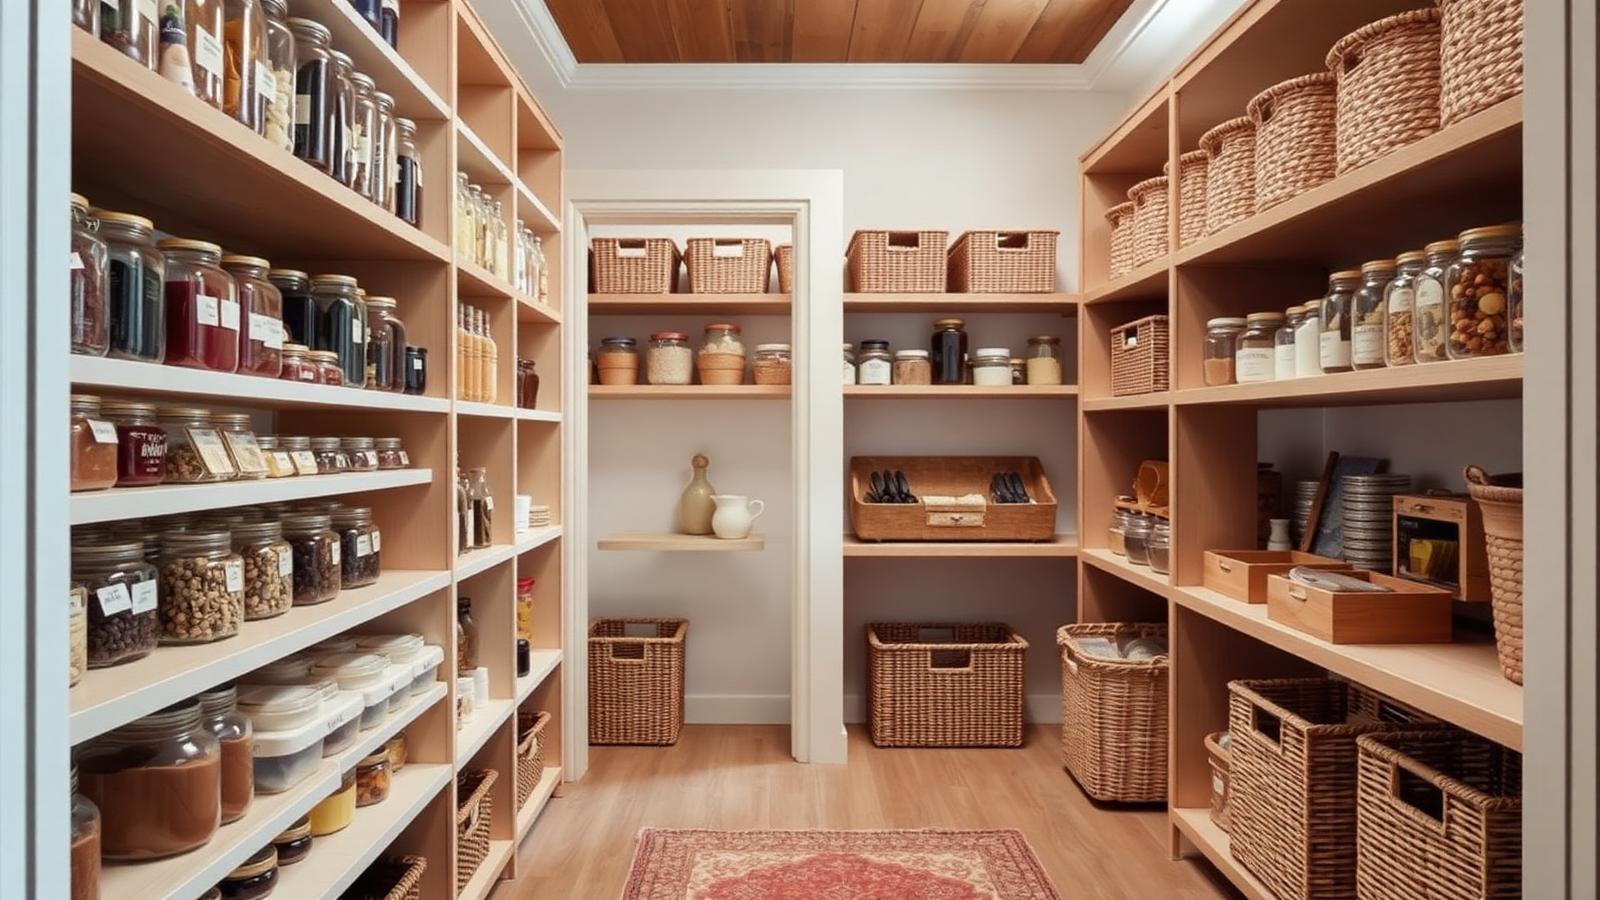
The pantries that stay organized share one trait: clear visual zones, with eye-level shelves reserved for daily-use items.
The Six Zones Every Pantry Needs
- Baking. Flour, sugar, leaveners, chocolate, extracts — all together so you don't hunt mid-recipe.
- Breakfast. Cereal, oats, granola, nut butters, syrup. One basket if you can.
- Snacks. One labeled basket per kid or category. The single highest-impact change in a family pantry.
- Dinner staples. Pasta, rice, beans, canned tomatoes, broths, oils, vinegars.
- Beverages. Coffee, tea, sparkling water, drink mixes.
- Overflow / bulk. Top or bottom shelf. The Costco pack that doesn't fit in the daily zone goes here.
What to Decant — and What to Leave Alone
Decant: flour, sugar, rice, pasta, oats, granola, nuts, coffee, dog food, and any snack the kids eat daily. Decanting wins on visibility, pest control, and shelf consistency.
Leave in original packaging: anything used less than monthly, anything with critical cooking instructions you reference each time, spices (decant elsewhere — see spice organization), and anything sold in a single-use quantity.
The Bins and Containers Worth Buying
- OXO Good Grips POP containers — the gold standard for decanting. One-button airtight seal, modular footprint, dishwasher-safe. $80–$120 for a 10-piece starter set.
- mDesign clear bins — best value for grouped items (snack baskets, baking bin). BPA-free, reinforced rims, four standard sizes that nest.
- Cambro food storage containers — the same brand restaurant kitchens use for bulk flour, sugar, rice. Cheaper per gallon than OXO, less attractive on display.
- Woven baskets (seagrass or rattan) — soften the look on lower shelves, hide overflow. Look for liners or stiff sides; cheap collapsible baskets sag within months.
- A real label maker (Brother P-touch) — handwritten labels look casual and intentional but fade. Printed labels keep the system readable when someone else is unloading groceries.
Layouts by Pantry Type
Walk-In Pantry (20+ sq ft)
- Eye-level shelves: daily-use bins (snacks, breakfast, dinner staples).
- Above eye-level: occasional-use items, party trays, large serving pieces.
- Below eye-level: heavy bulk (flour, rice, beverages).
- Floor: overflow bins, beverage cases.
- One wall reserved for decanted staples on open shelving for visibility.
Reach-In Pantry (single cabinet or shallow closet)
- Install at least one pull-out drawer between hip and shoulder height — turns the deepest shelf into accessible storage.
- Tiered shelf risers on canned goods so you see the back row.
- Door-mounted rack for small items (spices, foil, sandwich bags).
- Decant the top 10 staples only; bins for everything else.
Cabinet Pantry (kitchen cabinets only)
- Two clear bins per cabinet shelf — pull out, restock, slide back.
- Lazy Susan in any corner cabinet.
- Skip decanting on this scale; you don't have the shelf depth.
Labeling: What Actually Works
- Printed labels on every decanted container — vinyl, dishwasher-safe.
- Labels on every basket, including kid snack baskets (use names, not "snacks").
- Skip labels on bins for grouped overflow — they're just clutter when contents rotate weekly.
- Include the date on decanted bulk items (flour, oats) so you know when to refresh.
The 10-Minute Weekly Reset
- Pull everything off the front of each shelf.
- Wipe the shelf.
- Decant any new bulk items into their containers.
- Put back from oldest expiration to newest (rotate front-to-back).
- Note anything you're running low on for the next grocery list.
What People Get Wrong
- Buying bins before culling. Half the pantry is expired or unused; organize what's left.
- Decanting everything. Refill fatigue kills the system within months.
- Stackable bin towers in small pantries. Top bin gets pulled, bottom bin never opened.
- Identical clear containers with no labels. Looks beautiful, unusable when someone else is cooking.
- Mixing zones to fit pretty layouts. The pantry exists to find things fast, not to photograph well.
Budget Tiers
- $80–$200 (DIY refresh): 10 OXO POP containers, 6 mDesign bins, a label maker, two baskets. Done in an afternoon.
- $300–$700 (full walk-in): add 6 more POP containers, 8 more bins, 4 woven baskets, one pull-out drawer or shelf riser, lighting.
- $2,500–$8,000 (custom millwork): built-in pull-outs, integrated lighting, custom door, drawer dividers. Pays back over 10+ years.
Keep Reading
Frequently Asked Questions
Is decanting pantry items into jars worth it?
Yes for everyday staples (flour, sugar, rice, pasta, oats, coffee, snacks the kids eat daily). No for items used less than monthly — you'll wash and refill jars that mostly sit. Decanting wins on visibility, pest control, and shelf consistency; it loses on the time cost of refilling and the lost printed cooking instructions. The right answer is decanting 12–20 highest-use items, not the entire pantry.
What's the best pantry organization system?
Zone the pantry into six categories: baking, breakfast, snacks, dinner staples (pasta/rice/canned), beverages, and overflow/bulk. Use clear bins for grouped items (snack bin, breakfast bin), OXO POP containers for decanted staples, and a single labeled basket for each kid's snacks. Eye-level shelves for daily-use items, top shelf for overflow, bottom shelf for heavy bulk.
Which pantry containers are actually worth the money?
OXO Good Grips POP containers are the gold standard — one-button airtight seal, modular sizes, dishwasher-safe, and ours have lasted 6+ years without a failure. For value: mDesign clear bins for grouped items and Cambro food storage containers (the same ones professional kitchens use) for bulk items. Skip ultra-cheap unbranded acrylic sets — they crack within a year, especially if the pantry is near a heat source.
How do you organize a small or cabinet pantry?
Pull-out drawers turn deep shelves into accessible storage — install at least one between hip and shoulder height. Tiered shelf risers (Lazy Susans for corners, step risers for canned goods) reclaim vertical space. Door-mounted racks add 6–10 sq ft of small-item storage. Skip stackable bin towers in small pantries — they look efficient but cost more time per use than the storage they add.
How much does pantry organization cost?
Three tiers: DIY budget refresh with bins and labels runs $80–$200 for a typical cabinet pantry. A complete walk-in refresh with decanting containers, baskets, drawers, and a label maker lands at $300–$700. Custom-built pantry millwork with pull-outs and integrated lighting is $2,500–$8,000. The highest-ROI single purchase is almost always a set of 10 OXO POP containers ($80–$120) plus a label maker ($30).
How do you keep a pantry organized long-term?
Three habits: (1) a Sunday 10-minute reset when groceries come in — everything goes to its labeled home before the bags get unpacked anywhere else; (2) a quarterly expiration sweep — pull anything past date, donate unopened items you won't use; (3) the 'one in, one out' rule on bulk pantry items. Systems fail when the put-back step takes more than 10 seconds — keep zones broad enough that anyone in the household can use them.