
Under-Stairs Storage: 20 Ideas, Build Plans & Real Costs
Most homes ignore 36–60 cubic feet of usable storage tucked under the stairs — the equivalent of a small walk-in closet. Below: 20 designs from $400 IKEA hacks to $8,000 custom built-ins, the three zones every under-stair build should split into, and the DIY traps that ruin half the projects.
Updated May 2026 · 9 min read
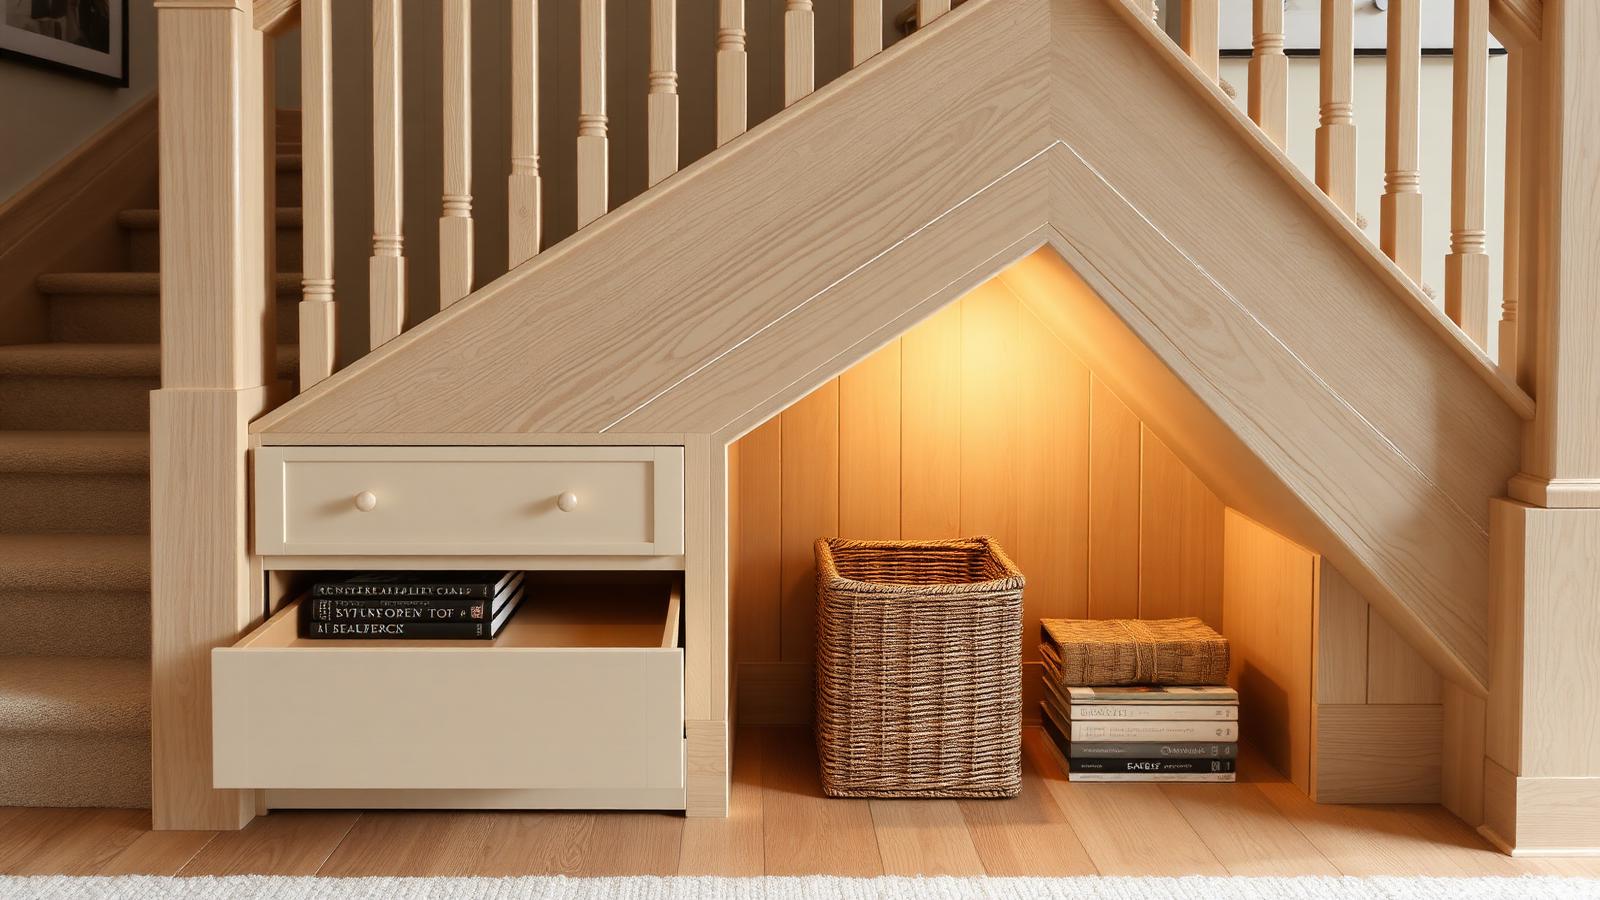
Under-stairs storage zoned into pull-out drawers and a low cubby — the layout that turns triangle dead-space into a small walk-in closet.
The Three Zones Every Under-Stair Build Needs
- Tall end (standing height): Coat closet, broom closet, or pantry. Full vertical storage with hanging rod or shelving.
- Middle (4–6 ft height): Pull-out drawers on full-extension slides. Highest daily-use storage.
- Low end (under 24 inches): Shallow cubbies for shoes, baskets for hats and mittens, or a built-in pet bed.
20 Under-Stairs Storage Ideas Worth Stealing
Storage-First Builds
- Full pull-out drawer wall. 3–5 drawers across, each tuned to a height. Best ROI for a busy household.
- Coat closet at the tall end + drawers in the middle. Resolves entryway clutter on day one.
- Under-stair pantry. Cans, dry goods, and small appliances. Add motion-sensor LED inside.
- Shoe-only build. 4–6 angled cubbies near the entry — works in a narrow under-stair run.
- IKEA Pax conversion. Standard Pax frames cut to fit the slope; the cheapest "looks custom" route.
- Wine cellar. Insulated cavity, climate-rated rack — $2,500–$6,000 build, photographs beautifully.
- Mudroom cubbies + bench. Open cubbies above, bench seating below, hooks at the side.
Habitable-Space Builds
- Reading nook with built-in bench. Cushioned bench, wall-mounted sconce, narrow bookshelf.
- Under-stair home office. Desk along the long wall, monitor at the tall end. Requires power rough-in.
- Half-bath conversion. Highest dollar-add at resale; requires plumbing access and 7 ft of clear height.
- Pet station. Built-in pet bed, food storage drawer, and water bowl pull-out.
- Kids' play nook. Low ceiling becomes a feature; add a magnetic chalkboard wall.
Display + Hybrid Builds
- Open shelf bookcase. Stepped shelving that follows the stair slope — purely decorative, but stunning.
- Display + storage split. Open shelving on the visible face, drawers behind on the hidden side.
- Bar / drinks station. Bottle shelving + glassware display + a small wine fridge.
- Floating shelves only. Minimal commitment, photo-friendly, leaves the cavity open for floor storage.
Renter-Friendly + Budget Builds
- IKEA Trofast bins. Stackable plastic bin frames slid under the slope. $200, no install.
- Free-standing shelving units. Cut-to-fit metal or wire shelving. Rental-safe.
- Curtain-front pull-outs. Linen curtain replaces cabinet doors; pulls back for full access. Cheap and surprisingly tidy.
- Drawer-only retrofit. Skip the cabinetry — buy 3 full-extension drawer kits and finish the fronts to match your trim.
Costs & Build Tiers
Tier 1: $400–$1,200 — IKEA Hack
Pax wardrobes cut to fit, kitchen drawer base cabinets ripped to depth, or Trofast bins on rails. Weekend build. Looks intentional if the doors and trim match the surrounding millwork.
Tier 2: $1,500–$3,500 — Semi-Custom
Off-the-shelf cabinet boxes (Kraftmaid, Schrock) with custom face frames, drawer fronts, and trim. Pro install. The sweet spot for most homes.
Tier 3: $4,000–$8,000+ — Fully Custom
Local cabinet shop builds plywood boxes to exact site measurements, integrates LED lighting, matches existing millwork, and includes premium drawer slides rated for 100+ lbs. 4–8 week lead time.
The Five DIY Traps That Ruin Half These Projects
- Assuming the cavity is square. It almost never is. Measure 3 times, scribe-fit the cabinetry.
- Skipping dust seal. The cavity collects dust from above. Drywall and tape the back before cabinets go in.
- Cheap drawer slides. Bottom-mount slides under 75-lb rating bow within a year. Spend on full-extension 100+ lb slides.
- No interior lighting. Add LED motion strips before install — retrofitting after is 4x the work.
- Wrong door swing. A door that swings into a tight hallway gets removed by year two. Pocket doors or pull-out drawers solve this.
Keep Reading
Frequently Asked Questions
How much usable space is actually under a staircase?
A typical 13-step residential staircase covers a triangular footprint of 36–60 cubic feet of usable interior space — roughly equivalent to a small walk-in closet. The tall end (where it meets the upper floor) is full standing height; the low end drops to under 18 inches. The most efficient builds split the space into three zones: standing-height closet at the tall end, pull-out drawers in the middle, and shallow cubbies or shoe storage at the low end.
What does under-stairs storage cost?
IKEA hack with Pax wardrobes and standard pull-outs: $400–$1,200. Semi-custom (off-the-shelf cabinetry + custom face frames): $1,500–$3,500. Fully custom built-in with pull-out drawers, integrated lighting, and matching millwork: $4,000–$8,000+. The cost driver is usually the pull-out mechanism count — full-extension drawer slides rated for 100+ lbs run $40–$120 per drawer.
Do I need a permit to build under-stairs storage?
Almost always no — interior built-ins, cabinets, and drawers don't require permits in most jurisdictions because they're not structural. You will need a permit if you're cutting into the staircase structure itself, adding HVAC or new electrical circuits, or building a habitable room (like a fully enclosed home office) under the stairs that requires egress. A licensed contractor can confirm local code in one phone call.
Is the space under stairs better for a closet, a half-bath, or a reading nook?
Closet wins on resale and daily utility — coat closet, mudroom, or pantry depending on location. Half-bath is the highest dollar-add at sale ($15,000–$25,000 typical equity gain) but requires plumbing access and 18–24 sq ft of clear height. Reading nooks photograph beautifully but get used less than expected — only build one if you have other storage and a clear daily reader in the household.
Can I install under-stairs drawers as a DIY?
Yes, if you're comfortable with measured cabinetry. Required skills: accurate site measuring (the triangle is rarely square), drawer-slide installation, basic face-frame construction, and finishing. Plan on 30–50 hours for a 3-drawer pull-out build. The two most-skipped steps that ruin DIYs: dust-sealing the back of the cavity before install, and adding LED motion lighting inside — both are easier before drawers go in than after.